> For the complete documentation index, see [llms.txt](https://help.swarmia.com/llms.txt). Markdown versions of documentation pages are available by appending `.md` to page URLs; this page is available as [Markdown](https://help.swarmia.com/settings/integrations/issue-trackers/jira/jira-server-and-jira-data-center.md).
# Jira Server and Jira Data Center
### Step 1: Check prerequisites
To be able to integrate Swarmia with your on-premise Jira instance:
* It must be reachable over the public internet, at a specific hostname, using HTTPS
* It must be able to send webhook requests to the public internet, using HTTPS
* You must be using Jira version 8.14 or above
If your Jira instance is behind a firewall that only allows traffic from specific IP addresses, make sure to allow these addresses:
* Inbound IPs (we make HTTPS requests to your Jira instance): 34.89.165.89 & 35.234.103.84
* Outbound IPs (your Jira instance makes HTTPS requests to us): 34.117.202.112 (hook.swarmia.com) & 34.107.207.241 (app.swarmia.com)
### **Step 2: Create a service account**
We will need to create a [Personal Access Token](https://confluence.atlassian.com/enterprise/using-personal-access-tokens-1026032365.html), which will be used for authentication between Swarmia and your Jira instance. This token needs to be tied to a specific user account, and it is better to create a dedicated user for this purpose, instead of tying it to someone's personal Jira account.
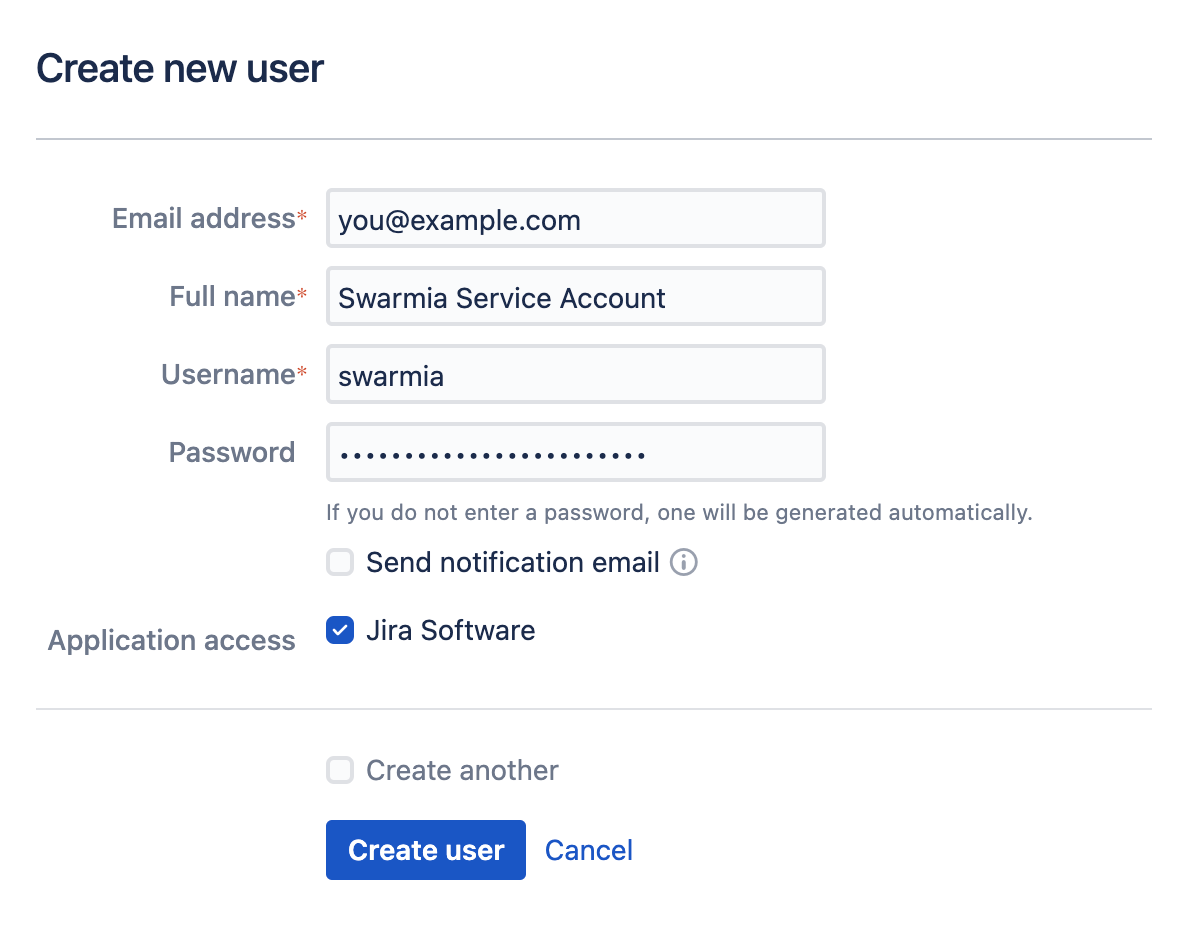
Go to your Jira user administration, and create a new user. You may use your own email address, and an arbitrary, secure password. The username and full name can also be whatever you prefer, as long as they help you identify this service account later.
### **Step 3: Create a personal access token**
To create the personal access token, you'll need to log into your Jira instance using the service account you just created.
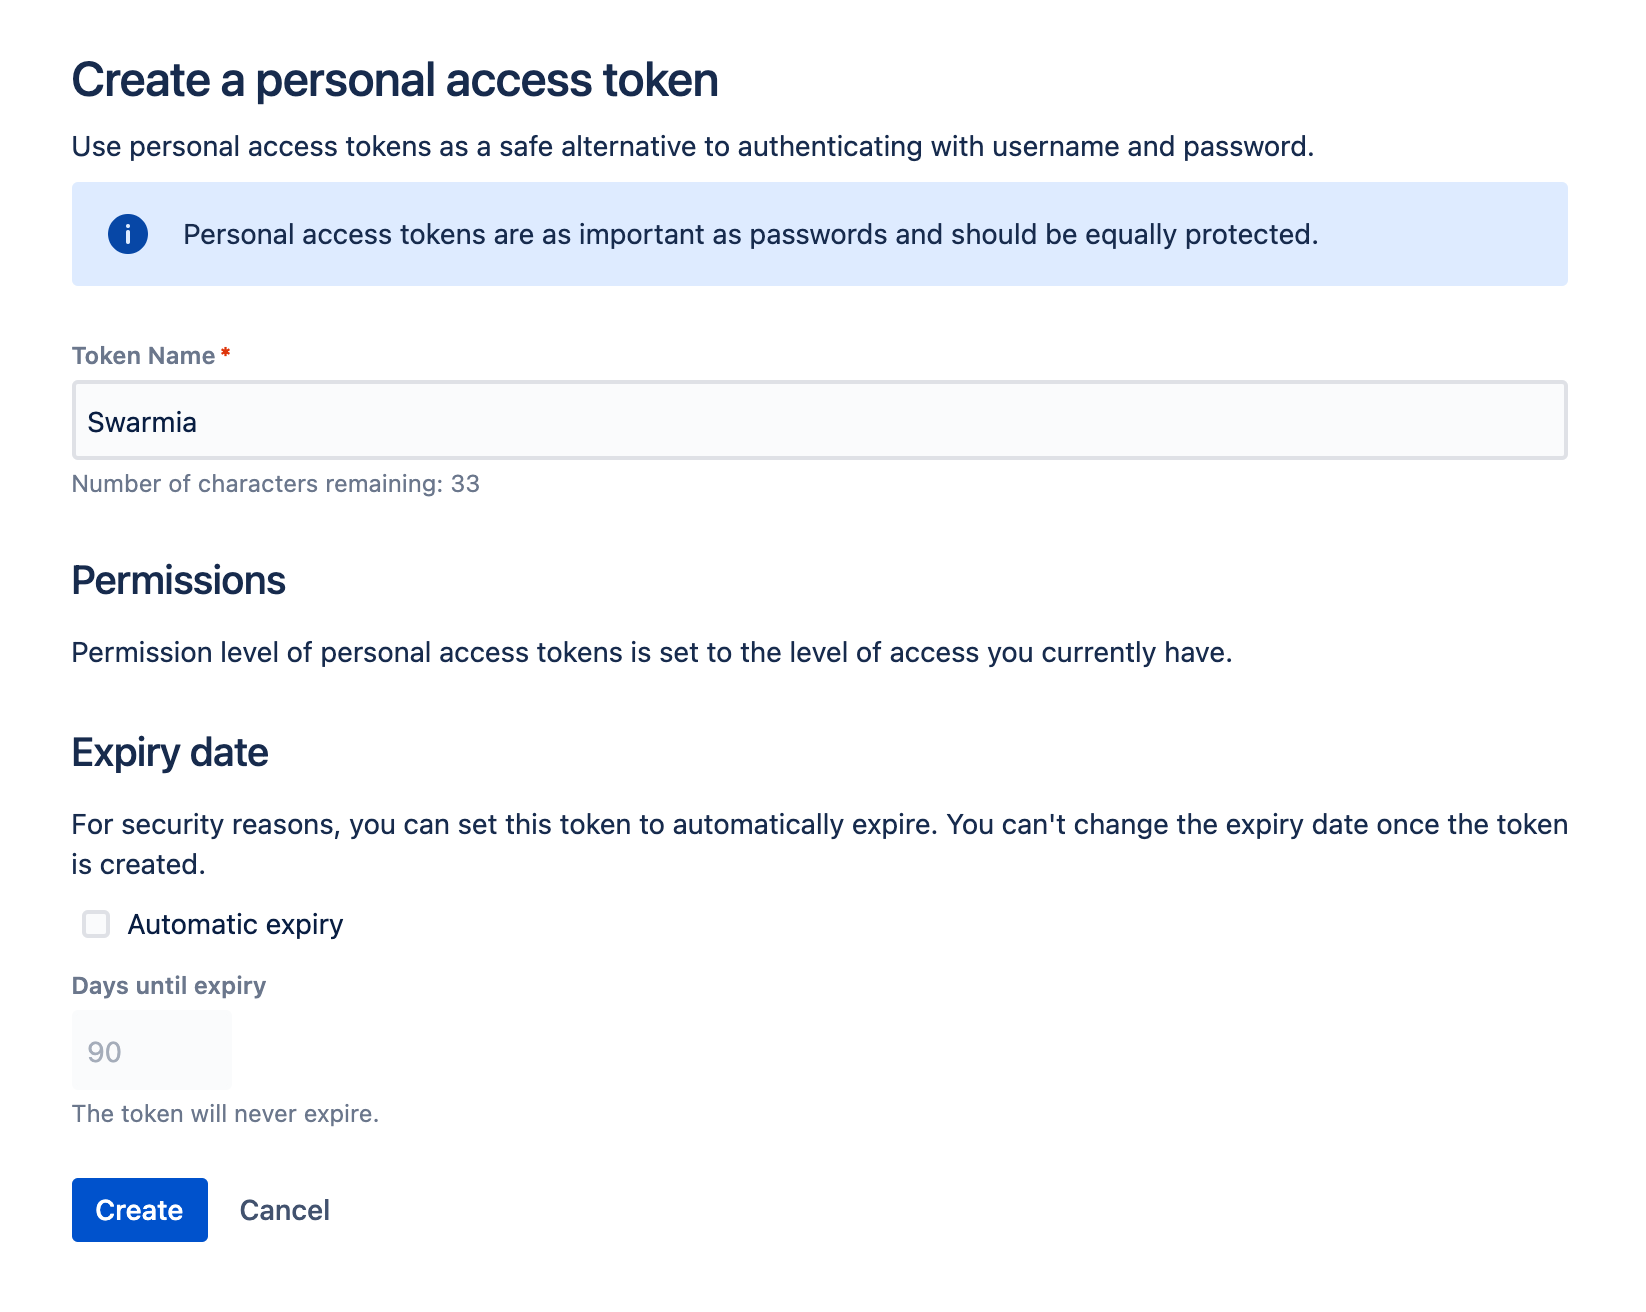
Once logged in, navigate to Profile → Personal Access Tokens → Create token, and make sure you uncheck "Automatic expiry".
Once you create the token, it will be displayed only once. Make sure you keep a copy of it in a safe place for the next step.
### **Step 4: Connect Swarmia to your instance**
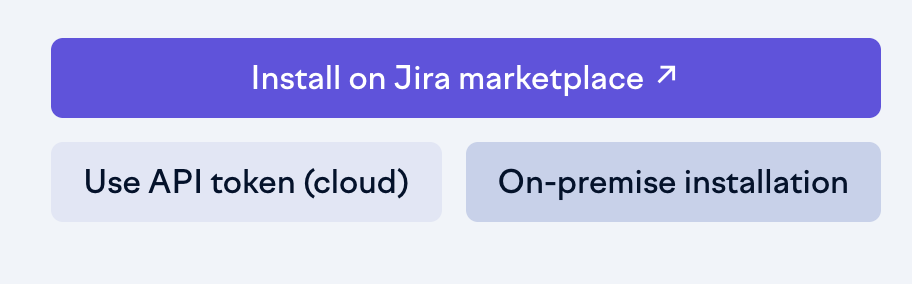
Navigate to the [issue tracker settings page](https://app.swarmia.com/settings/issue-trackers) and select the "On-premise installation" option.
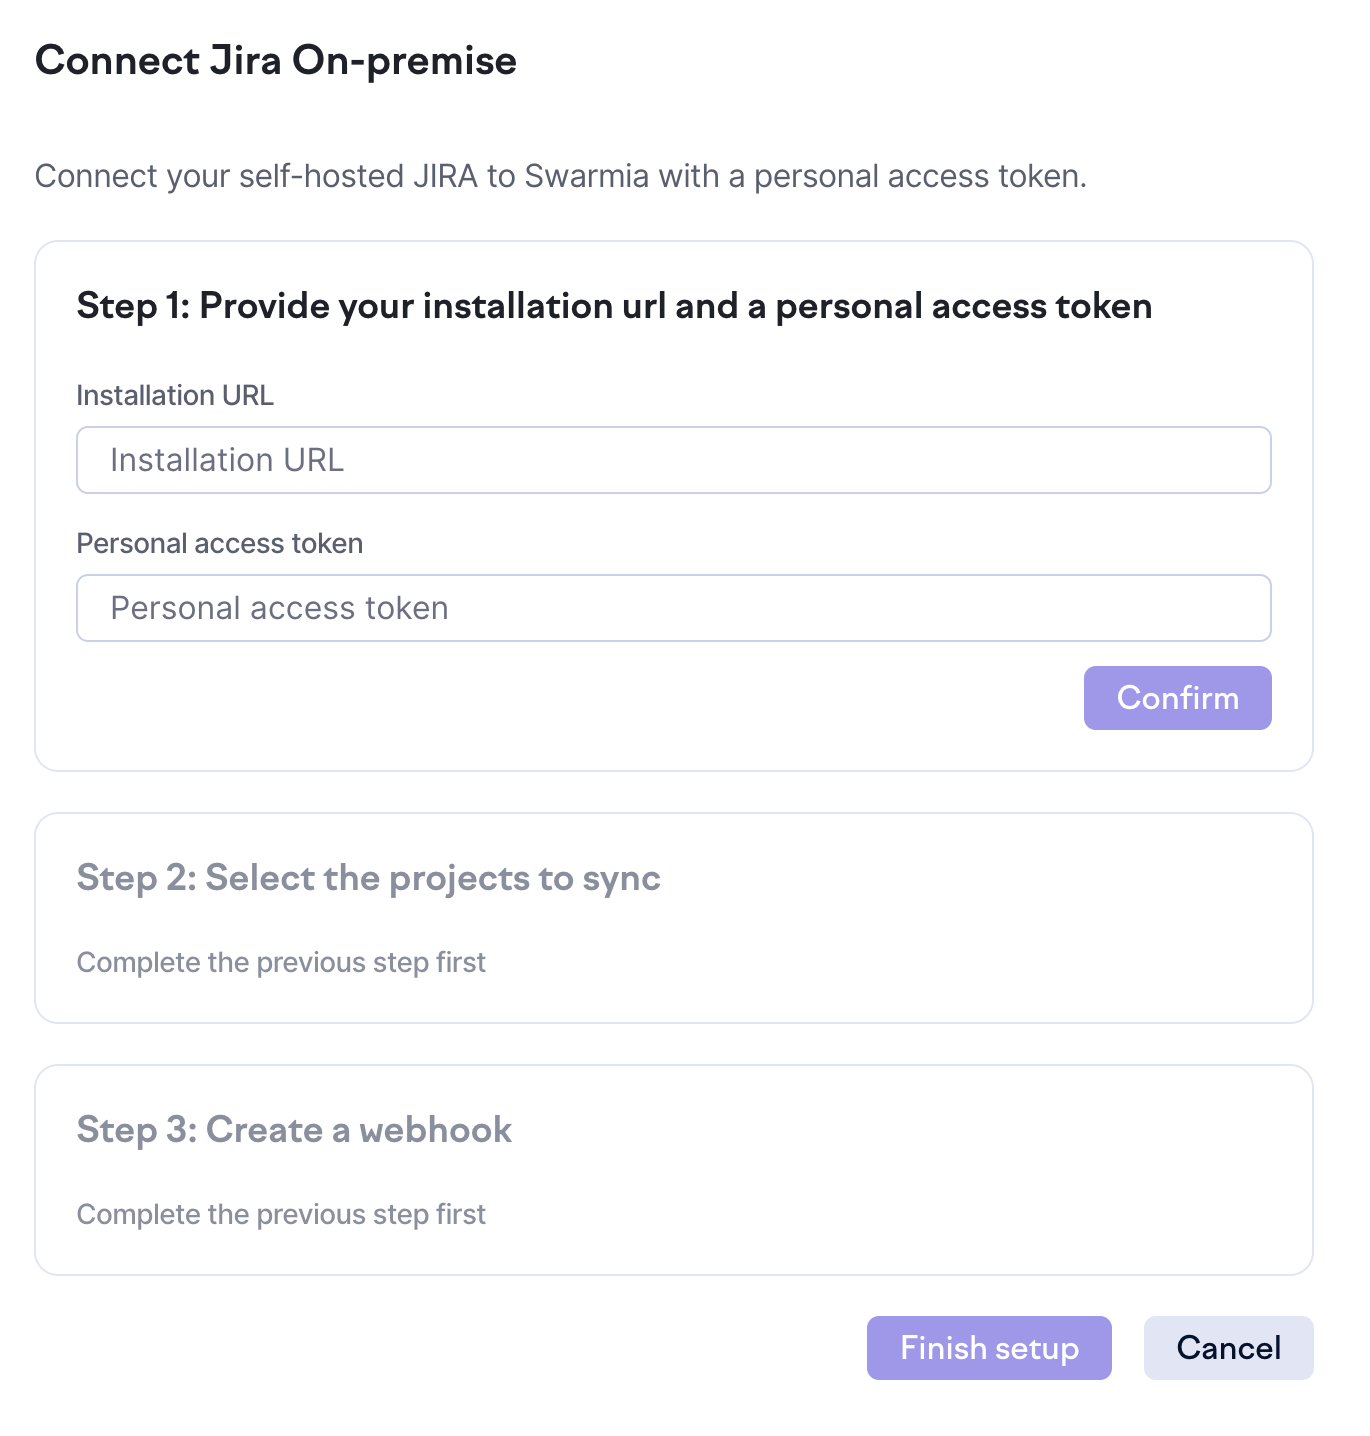
Follow the steps that will guide you to connect Swarmia to Jira. Once you have finished the three steps, click on "Finish setup". This will connect Swarmia to your Jira instance and start syncing your data.
#### Install webhook
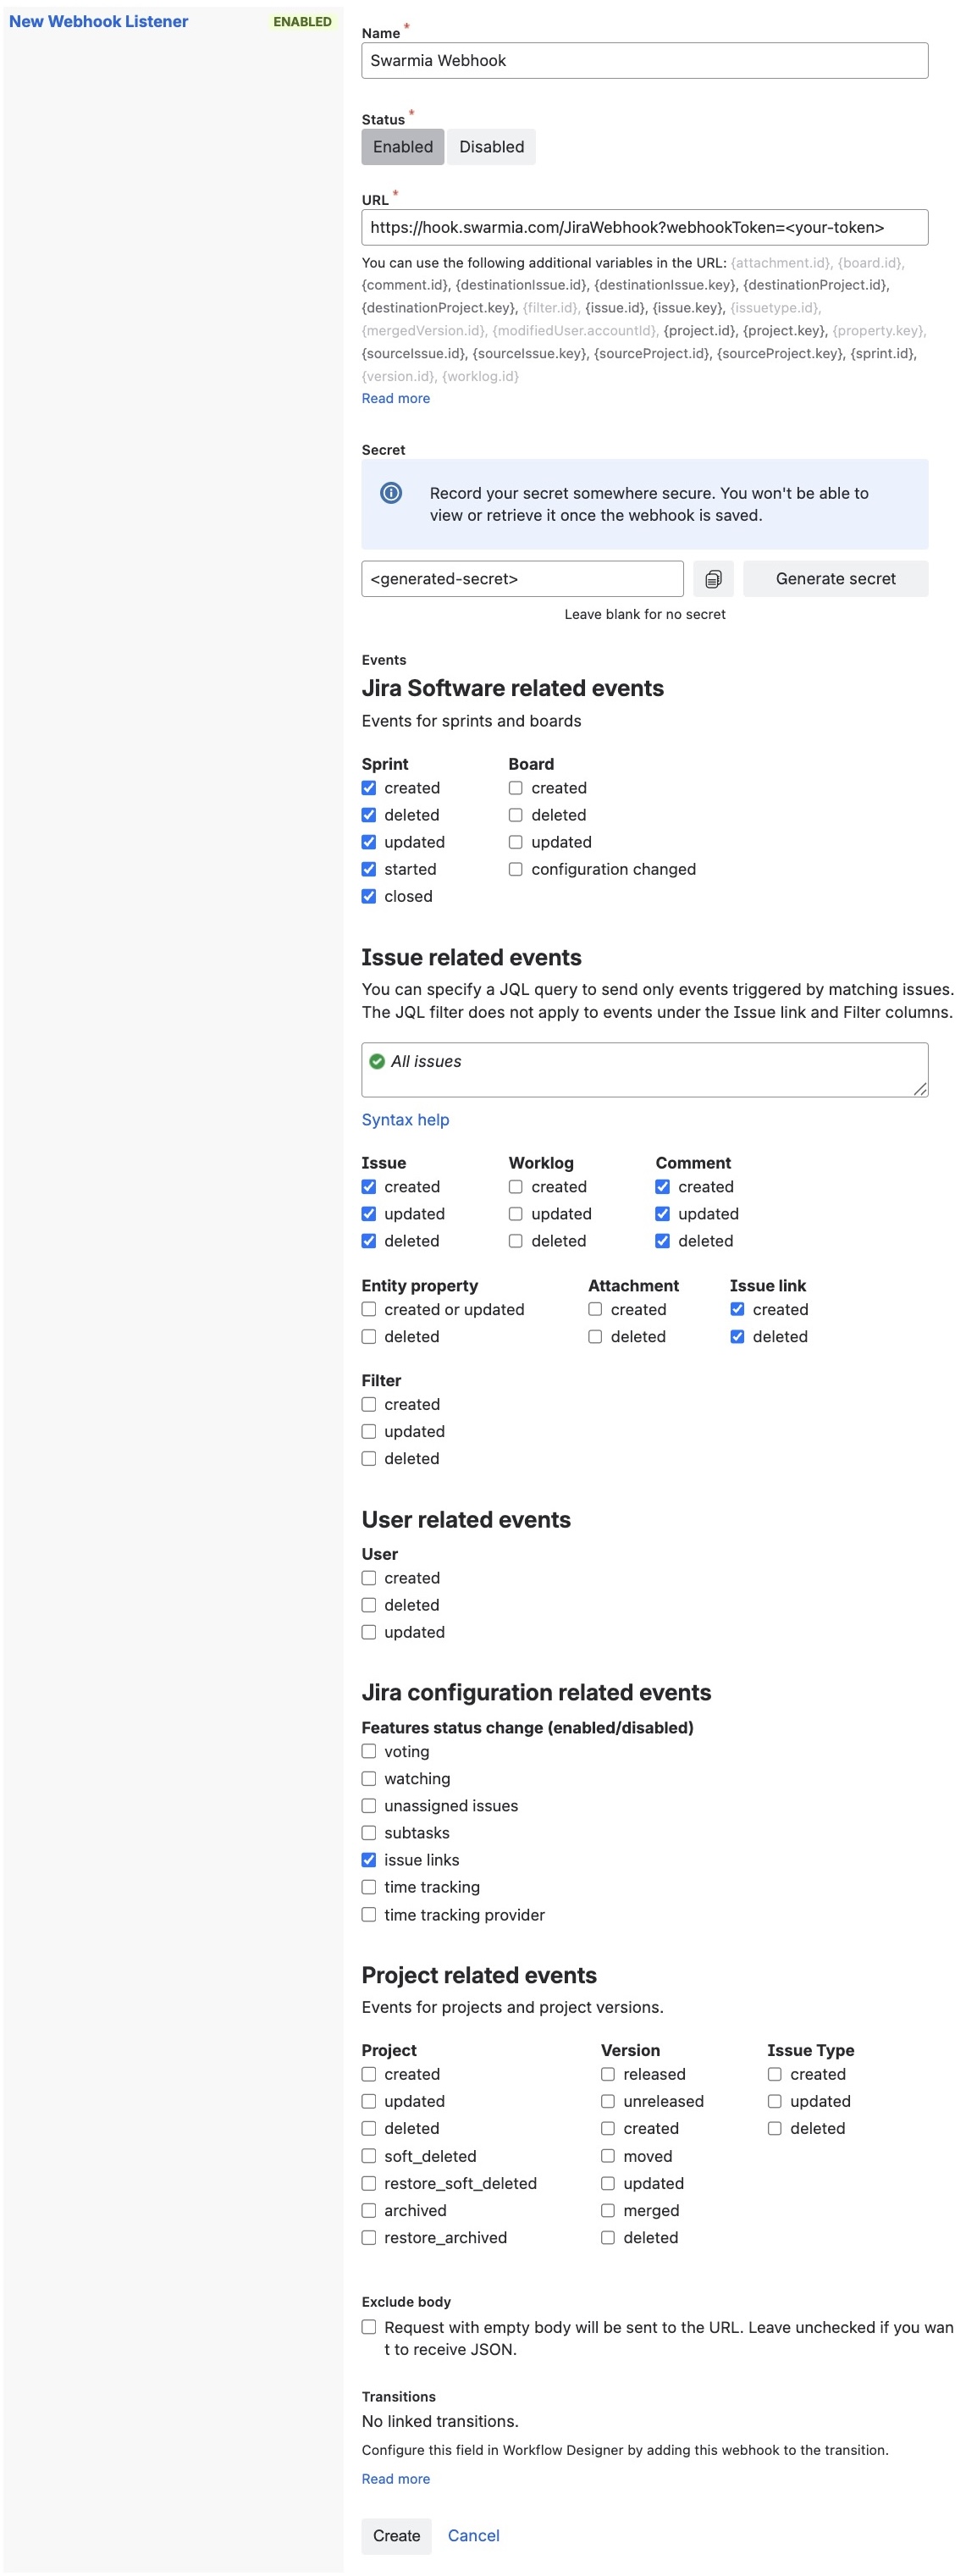
In order to keep the data in sync between Swarmia and your Jira instance, a webhook needs to be created. All the needed information are provided in the "Step 3: Create a webhook" during the installation.
With the webhook details at hand, navigate to Jira Administration → System → WebHooks → Create a WebHook, and fill in the form as follows:
Once the Jira integration is complete, proceed to [Jira configuration](/settings/integrations/issue-trackers/jira/jira-setup.md).
---
# Agent Instructions
This documentation is published with GitBook. GitBook is the documentation platform designed so that both humans and AI agents can read, navigate, and reason over technical content effectively. Learn more at gitbook.com.
## Querying This Documentation
If you need additional information that is not directly available in this page, you can query the documentation by asking a question.
Perform an HTTP GET request on the following URL with the `ask` and `goal` query parameters:
```
GET https://help.swarmia.com/settings/integrations/issue-trackers/jira/jira-server-and-jira-data-center.md?ask=&goal=
```
`ask` is the immediate question: it should be specific, self-contained, and written in natural language.
`goal` is what the user is ultimately trying to achieve, the reason they need the answer. Sharing it helps GitBook give you a better, more relevant answer. A goal is most helpful when it describes the outcome the user wants rather than restating the question. For example, with `ask=how do I create an API token`, a goal like `automate deployments from our CI pipeline` lets GitBook tailor the answer to that use case.
The response will contain a direct answer to the question and relevant excerpts and sources from the documentation.
Use this mechanism when the answer is not explicitly present in the current page, you need clarification or additional context, or you want to retrieve related documentation sections.